I have a soft spot for desserts that look impressive but secretly come together without turning on the oven. These No-Bake Chocolate Strawberry Cheesecake Cups are exactly that kind of magic. They combine a buttery crust, a rich chocolate filling, and fresh berries for a dessert that feels special but is surprisingly straightforward. With a total time of just over four hours (mostly hands-off chilling), they’re my go-to for last-minute dinner parties or when I need a sweet treat without the fuss.
The flavor is a perfect balance. You get the tangy creaminess of classic cheesecake, deepened with melted chocolate and brightened by juicy strawberry pieces. The texture is light and fluffy, setting up firm in the fridge. It’s an ideal make-ahead dessert for warm days, potlucks, or any time you want a decadent individual portion.
What are No-Bake Chocolate Strawberry Cheesecake Cups?
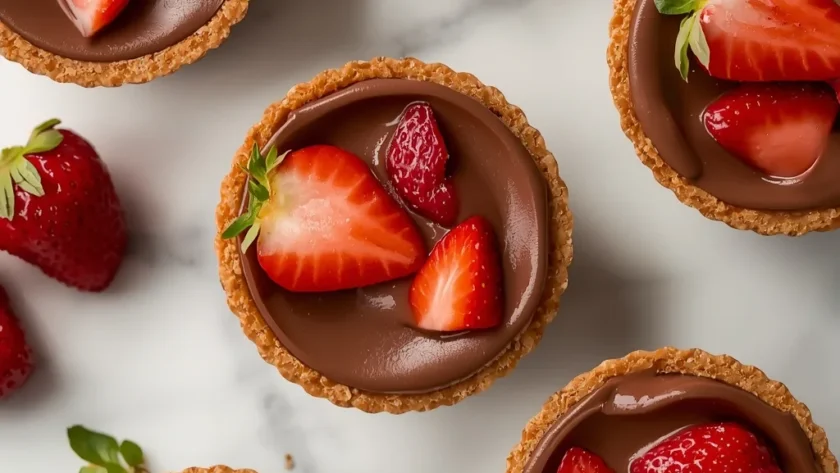
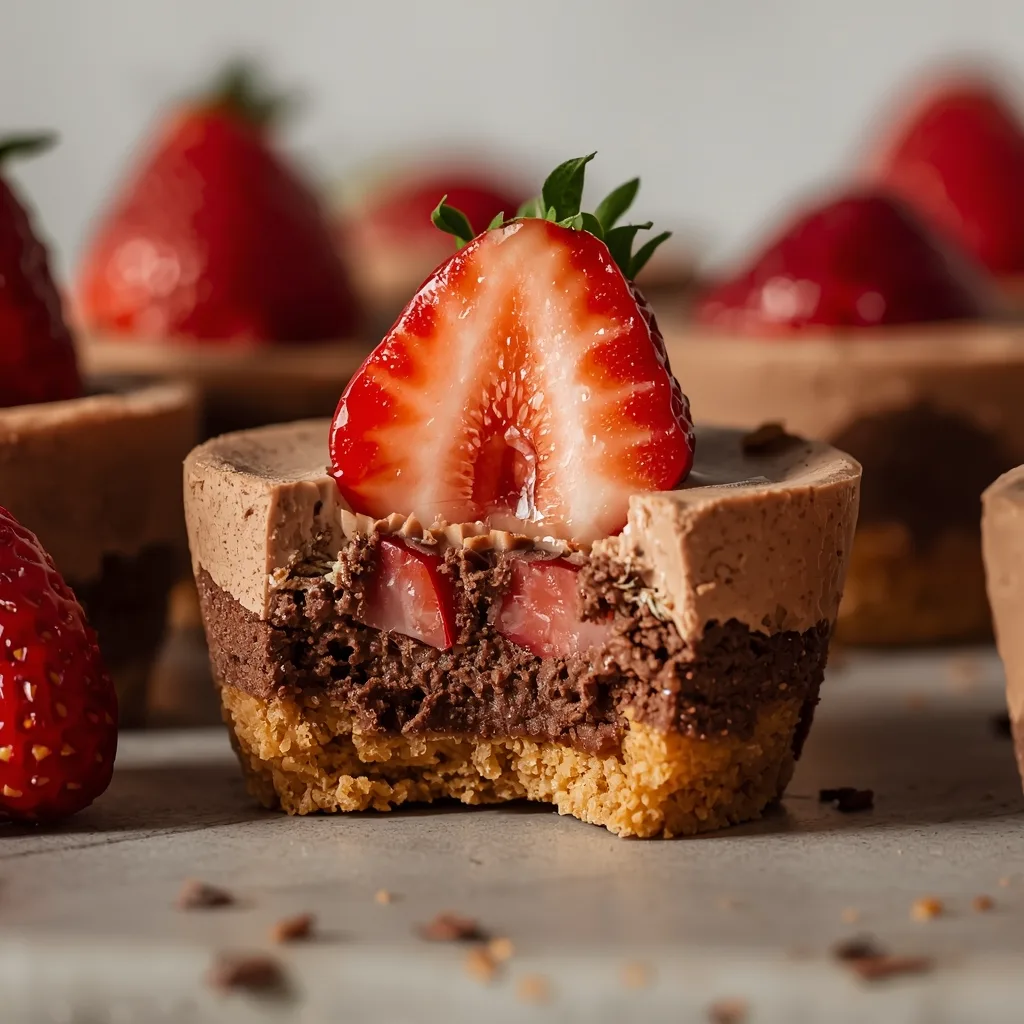
Think of it as a deconstructed cheesecake, layered in a glass. A graham cracker crust forms the base, followed by a mousse-like filling made from cream cheese, whipped cream, melted chocolate, and fresh strawberries. The “no-bake” part is the real hero—the filling sets in the refrigerator, not the oven. This method is a staple for easy American desserts, especially during summer.
The final cups are creamy and rich, with little bursts of sweet-tart fruit and a satisfying crunch from the crust. The chocolate isn’t overpowering; it complements the tang of the cream cheese beautifully. I make these when I want a dessert that feels elegant but requires minimal active kitchen time.
Reasons to Try No-Bake Chocolate Strawberry Cheesecake Cups
Here’s why this recipe has earned a permanent spot in my dessert rotation.
- No Oven Required — This is the ultimate summer-friendly dessert. You avoid heating up the kitchen entirely, which is a game-changer for warm-weather entertaining.
- Perfect for Make-Ahead — They need at least 4 hours to set, so making them the day before is not just okay, it’s encouraged. This spreads out the work and reduces stress.
- Individual Portions — Serving in cups or glasses means no slicing or messing with a springform pan. Everyone gets their own perfectly layered dessert, which always feels a bit more special.
- Customizable Foundation — Once you master the basic no-bake cheesecake filling, the flavor variations are endless. It’s a fantastic template for creativity.
- Crowd-Pleasing Flavors — The combination of chocolate and strawberry is a classic for a reason. It appeals to almost everyone, from kids to adults.
- Beginner-Friendly — If you can use a mixer and a spatula, you can make this. There’s no tricky baking science involved, just careful mixing and folding.
Ingredients Needed to Make No-Bake Chocolate Strawberry Cheesecake Cups
You likely have a few of these items already. Using quality ingredients here makes a noticeable difference in the final texture and taste.
For the Crust
- Graham Cracker Crumbs (1 cup) — This forms the classic, slightly sweet base. For the best texture, crush whole crackers in a bag until they resemble fine sand, or buy pre-crushed.
- Unsalted Butter (4 tbsp / ¼ cup, melted) — The binder that holds the crust together. Using unsalted lets you control the salt level. Melt it and let it cool slightly before mixing.
- Granulated Sugar (2 tbsp) — A little extra sweetness for the crust layer. It helps the crumbs caramelize slightly as they set.
For the Filling
- Full-Fat Cream Cheese (8 oz block, softened) — The star of the show. Full-fat is non-negotiable for a rich, stable filling that sets properly. Let it sit out for an hour until it’s soft to the touch.
- Powdered Sugar (½ cup, sifted) — Sweetens and helps stabilize the filling without grittiness. Sifting is key to avoiding lumps in your smooth cheesecake base.
- Pure Vanilla Extract (1 tsp) — Adds a warm, aromatic depth that enhances both the chocolate and berry flavors.
- Kosher Salt (¼ tsp) — Balances the sweetness and makes all the other flavors pop. Don’t skip it.
- Heavy Cream (½ cup, cold) — Whipped to stiff peaks, this is what gives the filling its light, mousse-like texture. Ensure it’s very cold for the best volume.
- Semi-Sweet Chocolate (4 oz, chopped) — Use a bar you enjoy eating for the best flavor. Chopping it helps it melt evenly. You can use chocolate chips in a pinch.
- Fresh Strawberries (1 cup, hulled and finely chopped) — They provide fresh, juicy bursts. Hull them well and chop into small, bite-sized pieces so they distribute evenly.
For Garnish (Optional)
- Additional Fresh Strawberries, sliced — For a beautiful, professional-looking finish on top.
- Chocolate Shavings or Melted Chocolate for drizzling — An extra touch of chocolate makes these individual desserts look bakery-worthy.
Instructions to Prepare No-Bake Chocolate Strawberry Cheesecake Cups
The process is simple but has a few key techniques. Follow these steps in order for the best results.
- Prepare the Crust — Mix the graham cracker crumbs, sugar, and melted butter until it looks like wet sand. Divide it among four 6-8 oz cups and press it down firmly with a spoon. Chill for 15 minutes to set.
- Make the Filling Base — In a large bowl, beat the softened cream cheese with an electric mixer until completely smooth and creamy, about 2 minutes. Scrape down the sides of the bowl.
- Sweeten the Base — Add the sifted powdered sugar, vanilla, and salt to the cream cheese. Beat on low to combine, then on medium for a full minute until the mixture is silky and lump-free.
- Whip the Cream — In a separate, chilled bowl, whip the cold heavy cream on high speed until stiff peaks form. This means the cream stands up straight when you lift the beaters.
- Fold in the Cream — Gently add the whipped cream to the cream cheese mixture. Use a spatula and broad, sweeping folds from the bottom up to combine them without deflating the cream. Stop when no white streaks remain.
- Melt the Chocolate — Melt the chopped chocolate using a double boiler or in the microwave in 30-second bursts, stirring until smooth. Let it cool for 2 minutes so it doesn’t shock the filling.
- Incorporate the Chocolate — Add the slightly cooled, melted chocolate to the filling. Fold gently until you have a uniform, light brown mixture. If you want to drizzle later, set aside a spoonful of chocolate now.
- Add the Strawberries — Fold in the chopped fresh strawberries gently to avoid crushing them. You want to keep their shape for little bursts of fruit.
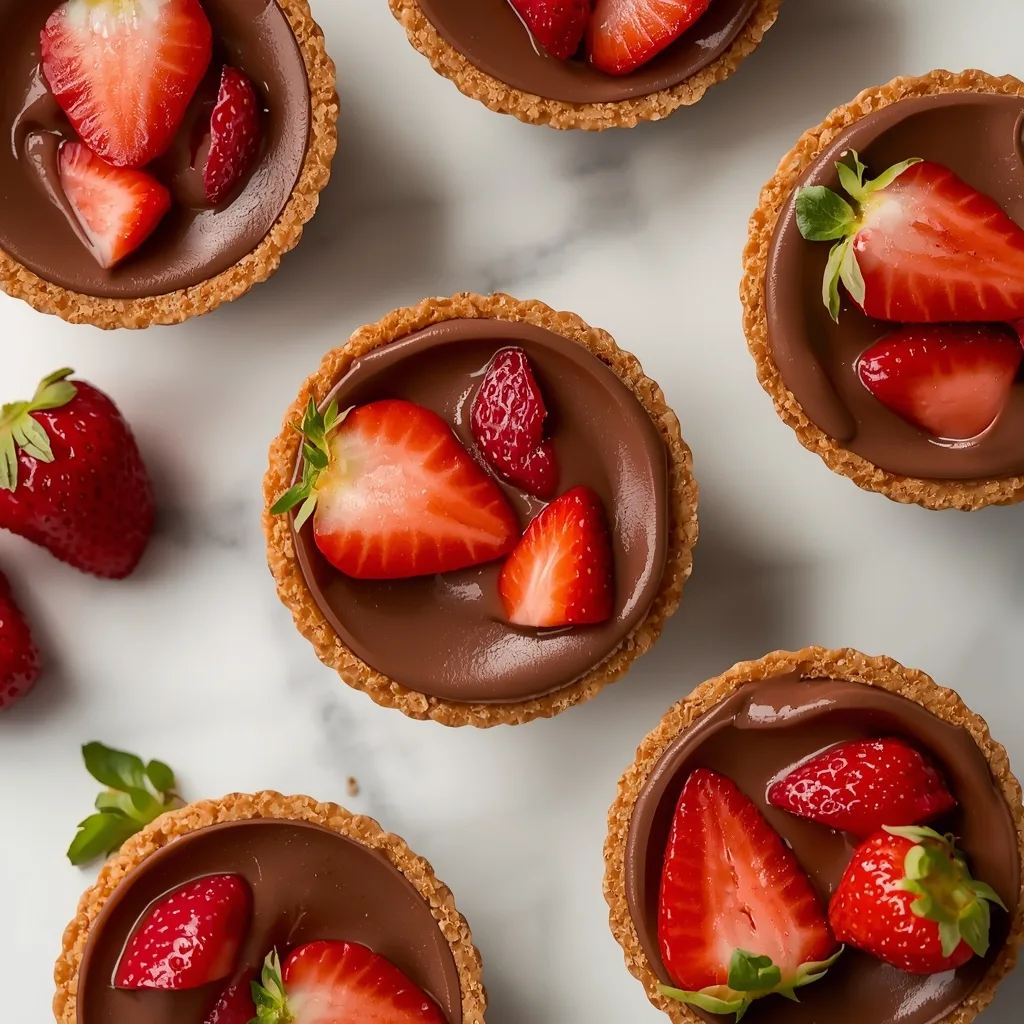
- Assemble the Cups — Remove the chilled crusts. Spoon or pipe the chocolate strawberry filling evenly over each crust, smoothing the tops.
- Add Garnishes — Top with sliced strawberries and drizzle with the reserved melted chocolate for a pretty finish.
- Chill to Set — Refrigerate the assembled cups for at least 4 hours, or overnight. This is crucial for the filling to become firm and sliceable.
- Serve — Let the cups sit at room temperature for 5-10 minutes before serving to slightly soften for the perfect creamy texture. Enjoy immediately.
What Goes Well With No-Bake Chocolate Strawberry Cheesecake Cups
While delicious on their own, these cups can be part of a larger dessert spread. Here are a few pairing ideas.
- Fresh Coffee or Espresso — The bitterness of a strong coffee cuts through the richness beautifully, making it a classic dessert pairing.
- A Glass of Port or Dessert Wine — A sweet, fortified wine complements the chocolate and berry notes for a more adult gathering.
- Extra Whipped Cream — For those who can’t get enough, a dollop of lightly sweetened whipped cream on the side is always welcome.
- A Scoop of Vanilla Bean Ice Cream — Serve the cup alongside a small scoop for an over-the-top, decadent treat.
- Light Appetizers — Since the dessert is rich, balance the meal with lighter starters like a simple green salad or bruschetta.
Key Tips for Making the Best Cheesecake Cups
A few small details make a huge difference in your final no-bake dessert. Here’s what I’ve learned from testing.
- Room Temperature Cream Cheese — This is the single most important tip. If the cream cheese is cold, you’ll have lumps no matter how long you mix. Let it soften completely.
- Chill Your Bowl — Before whipping the heavy cream, pop your mixer bowl and beaters in the freezer for 10 minutes. A cold bowl helps the cream whip faster and gain more volume.
- Fold, Don’t Stir — When incorporating the whipped cream and strawberries, use a folding motion with a spatula. Stirring aggressively will deflate the cream and make the filling dense.
- Cool the Chocolate — Let the melted chocolate cool for a couple of minutes before adding it to the filling. If it’s too hot, it can melt the whipped cream and cause the filling to separate or become greasy.
- Press the Crust Firmly — Use the bottom of a small glass or a tamper to really compact the crumb mixture. A firm press ensures the crust holds together when you scoop into it.
- Patience with Chilling — Don’t shortcut the 4-hour chill. The filling needs that time to set properly so it’s creamy yet firm, not soupy.
Creative Variations of This No-Bake Dessert
This recipe is wonderfully adaptable. Once you’ve mastered the basic method, try one of these easy twists.
- Different Crusts — Swap the graham crackers for crushed Oreos (leave out the extra sugar), vanilla wafers, or even ginger snaps for a spiced kick.
- Alternative Berries — Raspberries or a mix of blueberries and blackberries work beautifully in place of strawberries. Use the same 1-cup measurement.
- White Chocolate Version — Replace the semi-sweet chocolate with white chocolate. Pair it with raspberries for a stunning pink-and-white presentation.
- Citrus Zest — Add a teaspoon of finely grated orange or lemon zest to the filling for a bright, aromatic note that cuts the richness.
- Mocha Swirl — Dissolve a teaspoon of instant espresso powder into the melted chocolate before folding it in for a subtle coffee flavor.
- Nutty Addition — Fold in ¼ cup of finely chopped toasted almonds or pecans with the strawberries for added crunch.
Storage Guidelines for Your Cheesecake Cups
Proper storage keeps your dessert fresh and delicious. A quick note: the garnish is best added just before serving.
- Refrigerator Storage — Keep the assembled cups covered tightly with plastic wrap in the fridge. They will stay fresh for up to 3 days.
- Freezing for Later — For longer storage, freeze the cups (without garnish) in an airtight container for up to 1 month. Thaw them overnight in the refrigerator before serving.
- Prep-Ahead Crusts — You can make and press the crusts into the cups a day in advance. Just cover and keep them chilled until you’re ready to add the filling.
- Hold the Garnish — If making ahead, wait to add the fresh strawberry slices and chocolate drizzle until right before you serve. This keeps the berries fresh and the chocolate looking sharp.
Reheating Tips for No-Bake Cheesecake
Since this is a chilled dessert, “reheating” isn’t typical. However, here’s how to handle it if it gets too cold or you need to soften it.
- Countertop Rest — The best method is simply to let the cups sit at room temperature for 5-10 minutes before eating. This softens the filling to the perfect creamy consistency.
- Avoid the Microwave — Do not microwave these cups. The heat will melt the filling, collapse the airy texture, and likely make the crust soggy.
- For Frozen Cups — The only way to thaw frozen cheesecake cups is slowly in the refrigerator. This usually takes 8 hours or overnight and preserves the texture.
Nutrition Value (Per Serving)
Based on 1 serving equaling one complete cheesecake cup out of 4 total. These are rich, decadent individual desserts.
- Calories: 770
- Protein: 7g
- Fat: 54g
- Carbohydrates: 65g
- Fiber: about 3g
- Sugar: 46g
- Sodium: around 700mg
No-Bake Chocolate Strawberry Cheesecake Cups

Think of it as a deconstructed cheesecake, layered in a glass. A graham cracker crust forms the base, followed by a mousse-like filling made from cream cheese, whipped cream, melted chocolate, and fresh strawberries. The “no-bake” part is the real hero—the filling sets in the refrigerator, not the oven. This method is a staple for easy American desserts, especially during summer.
The final cups are creamy and rich, with little bursts of sweet-tart fruit and a satisfying crunch from the crust. The chocolate isn’t overpowering; it complements the tang of the cream cheese beautifully. I make these when I want a dessert that feels elegant but requires minimal active kitchen time.
Ingredients
For the Crust
- Graham Cracker Crumbs (1 cup) — This forms the classic, slightly sweet base. For the best texture, crush whole crackers in a bag until they resemble fine sand, or buy pre-crushed.
- Unsalted Butter (4 tbsp / ¼ cup, melted) — The binder that holds the crust together. Using unsalted lets you control the salt level. Melt it and let it cool slightly before mixing.
- Granulated Sugar (2 tbsp) — A little extra sweetness for the crust layer. It helps the crumbs caramelize slightly as they set.
For the Filling
- Full-Fat Cream Cheese (8 oz block, softened) — The star of the show. Full-fat is non-negotiable for a rich, stable filling that sets properly. Let it sit out for an hour until it’s soft to the touch.
- Powdered Sugar (½ cup, sifted) — Sweetens and helps stabilize the filling without grittiness. Sifting is key to avoiding lumps in your smooth cheesecake base.
- Pure Vanilla Extract (1 tsp) — Adds a warm, aromatic depth that enhances both the chocolate and berry flavors.
- Kosher Salt (¼ tsp) — Balances the sweetness and makes all the other flavors pop. Don’t skip it.
- Heavy Cream (½ cup, cold) — Whipped to stiff peaks, this is what gives the filling its light, mousse-like texture. Ensure it’s very cold for the best volume.
- Semi-Sweet Chocolate (4 oz, chopped) — Use a bar you enjoy eating for the best flavor. Chopping it helps it melt evenly. You can use chocolate chips in a pinch.
- Fresh Strawberries (1 cup, hulled and finely chopped) — They provide fresh, juicy bursts. Hull them well and chop into small, bite-sized pieces so they distribute evenly.
For Garnish (Optional)
- Additional Fresh Strawberries, sliced — For a beautiful, professional-looking finish on top.
- Chocolate Shavings or Melted Chocolate for drizzling — An extra touch of chocolate makes these individual desserts look bakery-worthy.
Instructions
- Prepare the Crust — Mix the graham cracker crumbs, sugar, and melted butter until it looks like wet sand. Divide it among four 6-8 oz cups and press it down firmly with a spoon. Chill for 15 minutes to set.
- Make the Filling Base — In a large bowl, beat the softened cream cheese with an electric mixer until completely smooth and creamy, about 2 minutes. Scrape down the sides of the bowl.
- Sweeten the Base — Add the sifted powdered sugar, vanilla, and salt to the cream cheese. Beat on low to combine, then on medium for a full minute until the mixture is silky and lump-free.
- Whip the Cream — In a separate, chilled bowl, whip the cold heavy cream on high speed until stiff peaks form. This means the cream stands up straight when you lift the beaters.
- Fold in the Cream — Gently add the whipped cream to the cream cheese mixture. Use a spatula and broad, sweeping folds from the bottom up to combine them without deflating the cream. Stop when no white streaks remain.
- Melt the Chocolate — Melt the chopped chocolate using a double boiler or in the microwave in 30-second bursts, stirring until smooth. Let it cool for 2 minutes so it doesn’t shock the filling.
- Incorporate the Chocolate — Add the slightly cooled, melted chocolate to the filling. Fold gently until you have a uniform, light brown mixture. If you want to drizzle later, set aside a spoonful of chocolate now.
- Add the Strawberries — Fold in the chopped fresh strawberries gently to avoid crushing them. You want to keep their shape for little bursts of fruit.
- Assemble the Cups — Remove the chilled crusts. Spoon or pipe the chocolate strawberry filling evenly over each crust, smoothing the tops.
- Add Garnishes — Top with sliced strawberries and drizzle with the reserved melted chocolate for a pretty finish.
- Chill to Set — Refrigerate the assembled cups for at least 4 hours, or overnight. This is crucial for the filling to become firm and sliceable.
- Serve — Let the cups sit at room temperature for 5-10 minutes before serving to slightly soften for the perfect creamy texture. Enjoy immediately.
FAQs
Can I use low-fat cream cheese?
I don’t recommend it. Full-fat cream cheese has the stability and richness needed for the filling to set properly. Low-fat versions contain more water and can result in a soft, sometimes grainy texture that may not hold its shape.
How long do No-Bake Chocolate Strawberry Cheesecake Cups need to set?
They require a minimum of 4 hours in the refrigerator. For the absolute best, firm-yet-creamy texture, I always plan to make them the day before and let them chill overnight. This is a perfect make-ahead dessert.
My filling seems runny after mixing. What did I do wrong?
The most common causes are under-whipped cream or adding chocolate that was too warm. Ensure your heavy cream is whipped to very stiff peaks, and let the melted chocolate cool for a full 2 minutes before folding it in. It will still be soft before chilling, but it will firm up in the fridge.
Can I make these into one large cheesecake instead of cups?
Absolutely. Press the crust into a 7-inch or 8-inch springform pan. Double the filling recipe, then pour it over the crust and chill overnight. You’ll get a beautiful, sliceable no-bake cheesecake.
What’s the best way to melt the chocolate?
I prefer a double boiler for gentle, even melting. Place the chopped chocolate in a heatproof bowl over a pot of barely simmering water, making sure the bowl doesn’t touch the water. Stir until smooth. If using a microwave, use 30-second intervals and stir well between each to avoid burning.
How far in advance can I chop the strawberries?
For the best texture and to avoid excess liquid in your filling, chop the strawberries just before you’re ready to fold them in. If they sit too long, they release juice, which can thin out the cheesecake mixture.
Wrapping Up
This recipe proves that a stunning dessert doesn’t need to be complicated. The layers of crunch, creamy chocolate, and fresh fruit come together in a way that feels both indulgent and refreshing. I hope you give these No-Bake Chocolate Strawberry Cheesecake Cups a try—they’re sure to become a requested favorite for any occasion that calls for something sweet, simple, and special.


