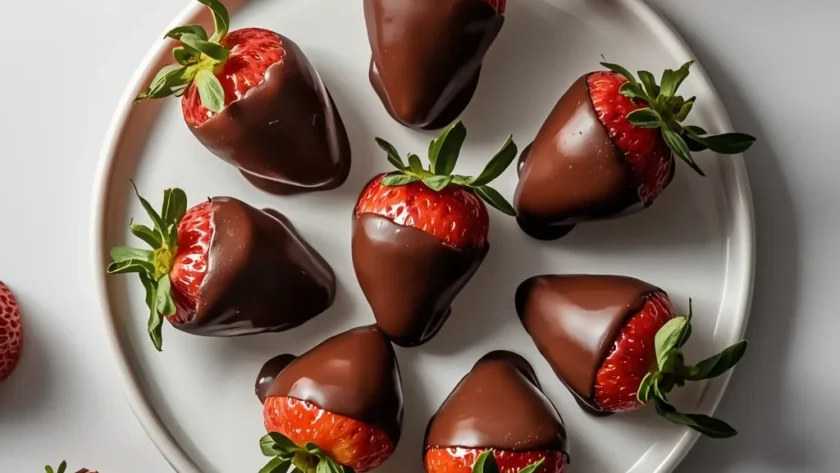
I’ve been making chocolate-covered strawberries for years, and I still get a thrill from that first glossy dip. They’re the ultimate no-bake dessert that feels impossibly fancy but is surprisingly straightforward. With just 20 minutes of active prep and a handful of ingredients, you can create a stunning treat perfect for Valentine’s Day, anniversaries, or a simple weekend indulgence.
The magic lies in the contrast: a rich, snappy dark chocolate shell giving way to a burst of sweet, juicy fruit. Getting that perfect glossy finish and firm snap is all about technique, which I’ll walk you through step-by-step.
What are Chocolate Covered Strawberries?
This classic confection is simply fresh strawberries dipped in melted chocolate. It’s a no-cook dessert that relies on quality ingredients and a simple technique called tempering to achieve its signature look and texture. While its exact origin is fuzzy, it became a staple of American romantic dining in the mid-20th century.
You get a fantastic textural play between the crisp, rich chocolate coating and the soft, tart interior of the berry. It’s a dessert that feels special and luxurious, which is why it’s so popular for date nights, bridal showers, and as an elegant party favor.
Reasons to Try Chocolate Covered Strawberries
Beyond being delicious, here’s why this dessert deserves a spot in your repertoire.
- Elegant Simplicity — They look like you spent hours, but the process is quick and requires no special baking skills, making them a fantastic last-minute dessert.
- Customizable Treat — From dark, milk, or white chocolate to a variety of toppings like nuts or sprinkles, you can tailor each batch to different tastes and themes.
- Naturally Gluten-Free — As long as your chocolate and toppings are certified, this is a worry-free dessert for guests with dietary restrictions.
- Perfect for Gifting — A box of homemade chocolate dipped berries feels incredibly personal and thoughtful, far surpassing store-bought versions.
- Crowd-Pleasing Appeal — It’s a rare dessert that appeals to almost everyone, from kids who love the sweetness to adults who appreciate the sophisticated pairing.
- Minimal Cleanup — You only need a bowl, a saucepan, and a baking sheet, so you’re not left with a mountain of dishes afterward.
Ingredients Needed to Make Chocolate Covered Strawberries
You only need a few key components, but their quality directly impacts your final result.
The Foundation
- 1 lb (16 oz) fresh strawberries — Look for medium to large berries with bright green stems attached and no soft spots. Their natural sweetness and acidity balance the rich chocolate.
- 8 oz high-quality dark chocolate (60-70% cacao) — Use bar chocolate, finely chopped, not chips. Chips contain stabilizers that prevent proper tempering and a good snap.
For the Chocolate Coating
- 1 tbsp refined coconut oil or vegetable shortening — This thin liquid fat makes the melted chocolate more fluid for easier dipping and gives the set coating a beautiful sheen.
- 1/4 tsp fine sea salt — A pinch enhances the chocolate’s depth and cuts through the sweetness, making the flavor more complex.
Optional Toppings & Finishes
- Assorted toppings (pistachios, strawberry powder, etc.) — Have these measured and ready in small bowls before you start dipping to add texture, color, and extra flavor.
Instructions to Prepare Chocolate Covered Strawberries
Follow these steps in order for the best results. Patience during the tempering process is your secret weapon.
- Prep the Berries — Gently rinse your strawberries under cool water and pat them completely dry with paper towels. Any water left on the berries will cause the chocolate to seize and become grainy. Leave the stems on for easy handling.
- Set Up Your Station — Line a baking sheet with parchment paper. Make sure your berries are at room temperature, as cold fruit will make the warm chocolate set too thickly and unevenly.
- Create a Double Boiler — Bring 1-2 inches of water to a simmer in a small saucepan over medium-low heat. Place the chopped chocolate, coconut oil, and salt in a heatproof bowl that fits snugly on top without touching the water.
- Melt Gently — Reduce the heat to low to maintain a gentle simmer. Stir frequently until the mixture is completely smooth and reaches 115-120°F (46-49°C) on an instant-read thermometer. This melts all the cocoa butter crystals.
- Cool to Tempering Temperature — Remove the bowl from the heat, wipe the bottom dry, and keep stirring. You want the chocolate to cool down to 88-90°F (31-32°C). This encourages stable crystals to form, which gives you that glossy finish and satisfying snap.
- Dip and Swirl — Holding a berry by the stem, dip it about three-quarters of the way into the chocolate. Lift it, let the excess drip back into the bowl for a few seconds, and gently swirl it to stop the drip.
- Add Toppings Fast — If using toppings, roll the wet chocolate portion in them immediately. The chocolate begins to set quickly at the proper temper, so you have about a minute to work.
- Let Them Set — Place the dipped strawberry on the parchment-lined tray. Repeat, spacing them apart. If your chocolate thickens, briefly re-warm it over the double boiler.
- Patient Setting — Let the berries sit at a cool room temperature (around 68-70°F / 20-21°C) for at least 1 hour until the coating is completely firm and glossy. Avoid the fridge initially to prevent condensation.
- Serve or Store — Once set, they’re ready. For storage, arrange them in a single layer in an airtight container lined with more parchment. They’re best within a day.
What Goes Well With Chocolate Covered Strawberries
While stunning on their own, these berries can anchor a beautiful dessert spread.
- Sparkling Wine or Champagne — The bubbles and acidity cut through the richness of the chocolate, making each bite taste brighter and more celebratory.
- A Cheese Board — Add them to a platter with soft brie, sharp cheddar, and crackers for a sweet contrast that elevates the entire experience.
- Fresh Whipped Cream — A small dollop on the side adds a light, creamy element for those who want to tone down the intensity of the dark chocolate.
- After-Dinner Coffee — A strong espresso or black coffee provides a bitter counterpoint that makes the sweet fruit and chocolate even more pronounced.
- Other Fresh Fruits — Serve alongside a platter of raspberries, orange segments, and pineapple for a vibrant, colorful, and healthy dessert option.
- Vanilla Ice Cream — The simplicity of vanilla acts as a blank canvas, letting the flavor of the berries and chocolate truly shine.
Key Tips for Making Chocolate Covered Strawberries
A few small details make the difference between good and great. Here’s what I’ve learned.
- Completely Dry Berries — This is non-negotiable. Even a tiny amount of moisture will cause the chocolate to seize into a thick, clumpy mess instead of a smooth coating.
- Temper for a Snap — Taking the time to melt, cool, and stir the chocolate to the specified temperatures ensures it sets hard and glossy. Skipping this leads to a soft, dull finish.
- Room Temperature Fruit — Dipping a cold strawberry causes the chocolate to set too quickly, resulting in a thick, uneven coat that’s difficult to work with.
- Avoid the Refrigerator Initially — Letting them set at cool room temperature prevents condensation from forming on the chocolate, which ruins the shine and can cause “bloom” (those white streaks).
- Use a Thermometer — While you can temper by sight and feel, a simple instant-read thermometer takes the guesswork out and guarantees perfect results every time.
- Chop Your Chocolate Evenly — Finely and uniformly chopped chocolate from a bar melts smoothly and consistently, unlike chocolate chips which are designed to hold their shape.
- Work in a Dry Environment — High humidity in your kitchen can prevent the chocolate from setting properly and can introduce moisture to your bowl. A dry, cool day is ideal.
Creative Variations of Chocolate Covered Strawberries
Once you master the classic, try these fun twists for different occasions.
- Drizzle with White Chocolate — After the dark chocolate sets, melt a little white chocolate and use a fork or piping bag to create elegant zig-zags or stripes over the berries.
- Create a Chocolate Bark Base — Pour a thin layer of tempered chocolate on parchment, place half-dipped berries on top, and sprinkle with sea salt. Break it into pieces once set for a shareable treat.
- Roll in Crushed Candy — Instead of nuts, try rolling the wet chocolate in finely crushed peppermints, toffee bits, or even pretzel pieces for a sweet-and-salty crunch.
- Use Different Chocolate — Swap the dark chocolate for high-quality milk or white chocolate. Remember that white chocolate is more delicate and burns easily, so melt it over even lower heat.
- Infuse the Chocolate — Add a drop or two of food-grade orange or peppermint oil to the melted chocolate for a subtle, sophisticated flavor infusion.
- Make them “Tuxedo” Style — Dip the berry three-quarters in dark chocolate, let it set, then dip just the tip in melted white chocolate to look like a bow tie. It’s adorable for parties.
Storage Guidelines for Chocolate Covered Strawberries
They are best fresh, but you can store them successfully with care.
- Single Layer is Essential — Always store them in a single layer in a container. Stacking will cause the chocolate shells to stick together and crack.
- Line the Container — Place parchment or wax paper in the bottom of your airtight container to prevent any potential sticking and absorb minimal moisture.
- Refrigerate After Setting — Once fully set at room temperature, you can transfer the container to the fridge. They’ll keep for up to 2 days this way.
- Brief Rest Before Serving — Remove them from the fridge 10-15 minutes before serving. This takes the chill off the berry and allows the chocolate’s flavor and snap to return to its best texture.
- Skip the Freezer — Freezing is not recommended. The water in the strawberries expands, damaging their cellular structure and turning them mushy when thawed.
Reheating Tips for Chocolate Covered Strawberries
You don’t reheat the finished berries, but you may need to rewarm your chocolate during the dipping process.
- Double Boiler Method — If your tempered chocolate thickens while you work, simply place the bowl back over the simmering water for just 5-10 seconds at a time, stirring until fluid again.
- Microwave with Caution — As a last resort, you can microwave the bowl in 10-second bursts on 50% power, stirring vigorously between each burst. This is risky as it’s easy to overheat and ruin the temper.
- Never Add Cold Ingredients — If you need more chocolate, ensure any new additions are already melted and warmed to a similar temperature to avoid shocking the tempered batch and causing it to seize.
Nutrition Value (Per Serving)
Based on 1 serving equaling roughly one-quarter of the recipe (about 4-5 large berries).
- Calories: 320
- Protein: 4g
- Fat: 22g
- Carbohydrates: 32g
- Fiber: around 7g
- Sugar: 20g
- Sodium: roughly 120mg
FAQs
Can I use chocolate chips instead of bar chocolate?
I don’t recommend it. Chocolate chips contain stabilizers that help them keep their shape in cookies, but these same ingredients prevent them from melting smoothly and tempering properly. Your coating will likely be soft, dull, and lack the classic snap.
How long do chocolate-covered strawberries last?
For the best texture and flavor, enjoy them within 24 hours. You can store them in the fridge for up to 2 days, but the berries will slowly release moisture, which can soften the chocolate shell and make the fruit less firm.
Why is my chocolate not getting shiny?
A dull finish usually means the chocolate wasn’t properly tempered, or it was cooled too quickly in the refrigerator. Condensation from the fridge can also cause bloom (white streaks). Ensure you follow the tempering temperatures and let them set at cool room temperature first.
Can I make these dairy-free or vegan?
Absolutely. Just ensure you use a dark chocolate that is certified dairy-free (many high-percentage dark chocolates are). Use refined coconut oil and check that any toppings, like sprinkles, are also vegan-friendly.
My chocolate seized and got clumpy. Can I fix it?
Sometimes. If you added a tiny bit of moisture, try immediately stirring in a teaspoon of additional warm coconut oil or shortening. This can sometimes bring it back. If it’s a full seize, it’s often best to start over with new chocolate.
What’s the best way to melt chocolate for dipping strawberries?
The double boiler method described in the instructions is the best. It provides gentle, indirect heat that melts the chocolate evenly without risking burning, which is crucial for successful tempering and a glossy finish.
Try These Popular Recipes
- Easy Chocolate Strawberry Dump Cake
- No-Bake Chocolate Strawberry Pudding
- No-Bake Chocolate Strawberry Cheesecake Bars
- No-Bake Chocolate Strawberry Pudding Dessert
Wrapping Up
Mastering chocolate covered strawberries is one of those kitchen skills that pays off again and again. It’s a project that’s equal parts fun and impressive. I hope this guide gives you the confidence to create a batch that’s as beautiful to look at as it is delicious to eat. Give it a try this weekend—you might just surprise yourself.
PrintChocolate Covered Strawberries

An elegant, no-bake dessert featuring plump, ripe strawberries dipped in rich, tempered dark chocolate. The glossy chocolate shell provides a satisfying snap that contrasts beautifully with the juicy, sweet fruit. Perfect for special occasions or as a sophisticated treat.
- Prep Time: 20
- Cook Time: 10
- Total Time: 90
- Yield: 4 1x
- Category: Dessert
- Method: No-Cook
- Cuisine: American
Ingredients
- 1 lb (16 oz) fresh strawberries, medium to large size, with stems attached and unblemished
- 8 oz high-quality dark chocolate (60-70% cacao), finely chopped
- 1 tbsp refined coconut oil or vegetable shortening
- 1/4 tsp fine sea salt
- Optional toppings: 2 tbsp finely chopped pistachios, 2 tbsp freeze-dried strawberry powder, 2 tbsp toasted coconut flakes, 2 tbsp rainbow sprinkles
Instructions
- Select and prepare the strawberries. Gently rinse the strawberries under cool running water and pat them completely dry with paper towels, taking care not to bruise them. Any residual moisture will prevent the chocolate from adhering properly and cause it to seize. Leave the green stems intact for easy handling and presentation.
- Prepare your workstation. Line a large baking sheet with parchment paper or a silicone baking mat. Have all your toppings ready in small, shallow bowls. Ensure your strawberries are at room temperature, as cold fruit can cause the warm chocolate to set too quickly and become thick.
- Temper the chocolate using the double boiler method. Fill a small saucepan with 1-2 inches of water and bring it to a simmer over medium-low heat. Place the finely chopped chocolate, coconut oil, and sea salt in a heatproof bowl that fits snugly on top of the saucepan without touching the water. The steam will gently melt the chocolate, preventing it from burning.
- Melt the chocolate slowly and stir constantly. Reduce the heat to low to maintain a gentle simmer. Stir the chocolate mixture frequently with a rubber spatula until it is completely smooth, fluid, and reaches a temperature of 115-120°F (46-49°C) on an instant-read thermometer. This initial melting phase ensures all cocoa butter crystals are dissolved.
- Cool the chocolate to working temperature. Remove the bowl from the heat and wipe the bottom dry to prevent water droplets from falling into the chocolate. Continue stirring the chocolate as it cools down to 88-90°F (31-32°C). This tempering process encourages stable crystal formation, resulting in a glossy finish and a firm snap when set.
- Dip the strawberries. Holding a strawberry by its stem, dip it into the tempered chocolate, swirling to coat about three-quarters of the berry. Lift it up and allow the excess chocolate to drip back into the bowl for a few seconds. This creates an even, thin coating without a heavy chocolate pool at the base.
- Apply toppings immediately. If using toppings, gently roll the dipped portion of the strawberry in your chosen topping while the chocolate is still wet. Work quickly, as the chocolate will begin to set within a minute at the proper tempering temperature.
- Set the strawberries. Place the dipped strawberry on the prepared parchment-lined tray. Repeat with the remaining berries, spacing them apart so they don’t touch. If the chocolate in the bowl begins to thicken, briefly return it to the double boiler for a few seconds to re-melt and re-temper.
- Allow the chocolate to fully set. Let the strawberries sit at cool room temperature (around 68-70°F / 20-21°C) for at least 1 hour, or until the chocolate coating is completely firm and glossy. Do not refrigerate during initial setting, as condensation can form and dull the chocolate’s shine.
- Serve and store properly. Once fully set, the strawberries are ready to serve. For storage, arrange them in a single layer in an airtight container lined with parchment paper. They are best enjoyed within 24 hours for optimal texture and freshness.
Notes
Storage: Store in a single layer in an airtight container in the refrigerator for up to 2 days. Bring to room temperature for 10-15 minutes before serving for the best texture and flavor. Freezing is not recommended, as it will damage the strawberry’s cellular structure and make it mushy upon thawing. For the shiniest chocolate, ensure your work area is not humid and avoid refrigerating until after the initial set.
Nutrition
- Calories: 320
- Sugar: 20g
- Sodium: 120mg
- Unsaturated Fat: 13g
- Carbohydrates: 32g
- Fiber: 7g
- Protein: 4g
- Cholesterol: 2mg
Keywords: chocolate covered strawberries, chocolate dipped strawberries, easy dessert, no bake dessert, valentine’s day dessert, party dessert, fresh fruit dessert, dark chocolate strawberries, tempered chocolate, simple dessert


